Updated on Monday, 12 February 2024
I have updated this article to implement the newsletter subscription using TypeScript with Next.js.
Having a Newsletter subscription on your blog can be beneficial. It provides a way to build a closer connection with your readers, keep the blog fam up to date with your latest articles, and drive traffic to your blog.
In this tutorial, you will learn how to set up a Mailchimp Newsletter subscription on your Next.js TypeScript blog.
Prerequisite
To follow along with this tutorial, a general knowledge of building APIs in Node.js and working with TypeScript and React will make it easier to understand the code, but in-depth knowledge of both is not required.
Why Mailchimp?
MailChimp is a popular online marketing tool that you can use to manage your email list when you start getting subscribers. They have a free version for people with 2000 contacts or less. It's good enough for people beginning their newsletter journey.
Setting Up Mailchimp
Create an account with MailChimp.
To get started, click here to create a free MailChimp account. When users subscribe to your newsletter, their email address is added to your Audience on your Mailchimp account.
Obtain API Keys and Audience ID
Mailchimp provides API keys that allow other applications, i.e. your Next.js blog, to access your Audience. To connect your blog to Mailchimp API, we will need three environmental variables from Mailchimp;
- Generated API Key: grants access to your Mailchimp account. For documentation on how to get it, click here.
- API Server : This indicates the region where your Mailchimp data is stored ( e.g.
us2) - Audience ID
Build Next.Js API and Newsletter Form
We need a form and an API endpoint to collect the user's email and save it on Mailchimp. The good news is that Next.js allows us to do both without creating a separate backend application using Node.js.
To create a simple API, we only need to create a pages/api folder in our Next.js application. Next.js will automatically map any file inside this folder to the /api/* directory, turning it into an endpoint instead of a page. For more information on Next API routes check here.
When using the App Router version, your route file will be located in the app/api/route.ts. For more information on the App Route Handler, click here.
To start, create a new Next.js application. Run the following command and follow the installation setup. Make sure to select TypeScript as part of your setup.
1npx create-next-app@latest
2
Setup environment variables for development and production
It is considered best practice to store environment variables in .env files. Please avoid pushing your environment variables to your remote branch. Remember to add the .env.local file to your .gitignore.
Local Setup
Create a .env.local file in the root folder of your next js application. Place your environment variables in that file:
1MAILCHIMP_API_KEY="your-mailchimp-api-key"
2MAILCHIMP_AUDIENCE_ID="your-mailchimp-audience-id"
3MAILCHIMP_API_SERVER="your-api-server-region-prefix"
4
Production Setup
NETLIFY: To add these variables to Netlify, go to site settings > Build & deploy > Environment > Edit Variables.
VERCEL: To add environmental variables in Vercel, refer to their documentation for detailed instructions. For a simple walkthrough, go to the project settings > Environment Variables.
Create Next.Js Server-side API Endpoint
Axios is a tool that provides an easy and clean way to make API requests. Later on, we will use it to make a POST request to the Mailchimp marketing API to add a new email to our audience list. Make sure to install Axios and zod by running the following command:
1npm install axios
2npm install zod
3
Next, create a subscribe.ts file inside the pages/api folder. This file will contain the server-side API route for adding an email to the audience list.
Create pages/api/subscribe.ts and paste the following code inside it:
1import axios from "axios";
2import type { NextApiRequest, NextApiResponse } from "next";
3import { z } from "zod";
4
5// Define response data type
6type Data = { message?: string; error?: string; };
7
8// Email validation schema
9const EmailSchema = z
10  .string()
11  .email({ message: "Please enter a valid email address" });
12
13// Subscription handler function
14const subscribeHandler = async (
15  req: NextApiRequest,
16  res: NextApiResponse<Data>
17) => {
18  // 1. Validate email address
19  const emailValidation = EmailSchema.safeParse(req.body.email);
20  if (!emailValidation.success) {
21    return res.status(400).json({ error: "Please enter a valid email address" });
22  }
23
24  // 2. Retrieve Mailchimp credentials from environment variables
25  const API_KEY = process.env.MAILCHIMP_API_KEY;
26  const API_SERVER = process.env.MAILCHIMP_API_SERVER;
27  const AUDIENCE_ID = process.env.MAILCHIMP_AUDIENCE_ID;
28
29  // 3. Construct Mailchimp API request URL
30  const url = `https://${API_SERVER}.api.mailchimp.com/3.0/lists/${AUDIENCE_ID}/members`;
31
32  // 4. Prepare request data
33  const data = {
34    email_address: emailValidation.data,
35    status: "subscribed",
36  };
37
38  // 5. Set request headers
39  const options = {
40    headers: {
41      "Content-Type": "application/json",
42      Authorization: `api_key ${API_KEY}`,
43    },
44  };
45
46  // 6. Send POST request to Mailchimp API
47  try {
48    const response = await axios.post(url, data, options);
49    if (response.status == 200) {
50      return res.status(201).json({ message: "Awesome! You have successfully subscribed!" });
51    }
52  } catch (error) {
53
54    if (axios.isAxiosError(error)) {
55      console.error(
56        `${error.response?.status}`,
57        `${error.response?.data.title}`,
58        `${error.response?.data.detail}`
59      );
60
61      if (error.response?.data.title == "Member Exists") {
62        return res.status(400).json({
63          error: "Uh oh, it looks like this email's already subscribed🧐",
64        });
65      }
66    }
67
68    return res.status(500).json({
69      error:
70        "Oops! There was an error subscribing you to the newsletter. Please email me at ogbonnakell@gmail.com and I'll add you to the list.",
71    });
72  }
73};
74
75export default subscribeHandler;
76
In the code above, we created an asynchronous function called subscribeHandler that takes request and response as parameters. We imported the necessary modules.
1import axios from 'axios'
2import type { NextApiRequest, NextApiResponse } from "next";
3import { z } from "zod"; // Zod is used for data validation
4
{ NextApiRequest, NextApiResponse } is a built-in type support for API routes.
zod is a schema validation library for form fields. We use it to validate the email address obtained from the request body.
1type Data = { message?: string; error?: string; };
2
3// Email validation schema
4const EmailSchema = z
5  .string()
6  .email({ message: "Please enter a valid email address" });
7
Next, we define a type called Data for the response data.
We defined a variable called EmailSchema, which is used to validate the email address in the request body.
1const subscribeHandler = async (
2  req: NextApiRequest,
3  res: NextApiResponse<Data>
4) => {
5
We attach the built-in type for API Routes to the request and response parameters, as shown in the code snippet above.
We use the EmailSchema.safeParse function to validate if the email from the req.body is valid. The result of the validation is saved in the emailValidation emailValidation variable.
1) => {
2  // Validate email address
3  const emailValidation = EmailSchema.safeParse(req.body.email);
4  if (!emailValidation.success) {
5    return res.status(400).json({ error: "Please enter a valid email address" });
6  }
7
The zod library then returns the success and data properties from the result.
We check the emailValidation.success property to determine whether the validation was successful. If it fails the validation, we send a response with a status code of 400 (Bad Request).
1// Retrieve Mailchimp credentials from environment variables
2const API_KEY = process.env.MAILCHIMP_API_KEY;
3const API_SERVER = process.env.MAILCHIMP_API_SERVER;
4const AUDIENCE_ID = process.env.MAILCHIMP_AUDIENCE_ID;
5
6// Construct Mailchimp API request URL
7const url = `https://${API_SERVER}.api.mailchimp.com/3.0/lists/${AUDIENCE_ID}/members`;
8
Next, we retrieve the Mailchimp environmental variables that we saved in the env.local file using process.env. We save the Mailchimp URL for adding a new email subscriber in a url constant variable, with the environmental variables present in the url. We will use this URL to make a POST request with Axios. To view the Mailchimp API documentation, click here.
As mentioned earlier, the email validation process returns two properties: success and data. The emailValidation.data property contains the validated email string. We set this validated email string as the email address and assign the status property as 'subscribed' as shown below.
1const data = {
2  email_address: emailValidation.data,
3  status: "subscribed",
4};
5
6// Set request headers
7const options = {
8  headers: {
9    "Content-Type": "application/json",
10    Authorization: `api_key ${API_KEY}`,
11  },
12};
13
The term 'subscribed' is part of the Mailchimp API and indicates that the user has been subscribed. I have provided a link to the Mailchimp marketing API, which you can use to update your data object properties with keys of your choice. Both email_address and status properties are required by the Mailchimp marketing API.
We also created an options object that specifies the content type and sets the authorization header to your api_key.
To add additional properties to the url, see the full list of options available.
Finally, we make an asynchronous axios post request with the url, data, and options passed as parameters inside a try-catch block. The result is stored in the response variable.
1try {
2  const response = await axios.post(url, data, options);
3  return res
4    .status(201)
5    .json({ message: "Awesome! You have successfully subscribed!" });
6} catch (error) {
7  // TODO: add this recent updated part to the article
8  if (axios.isAxiosError(error)) {
9    console.error(
10      `${error.response?.status}`,
11      `${error.response?.data.title}`,
12      `${error.response?.data.detail}`
13    );
14
15    if (error.response?.data.title == "Member Exists") {
16      return res.status(400).json({
17        error: "Uh oh, it looks like this email's already subscribed🧐",
18      });
19    }
20  }
21
22  return res.status(500).json({
23    error:
24      "Oops! There was an error subscribing you to the newsletter. Please email me at ogbonnakell@gmail.com and I'll add you to the list.",
25  });
26}
27
If the post request is successful, we return a 201(created) response along with a success message.
If the post request is unsuccessful, we catch the error and return a 500(server error ) status code with a generic error message. Additionally, I console.log the error message in case it is not a 500 error message.
The axios.isAxiosError(error) function is specific to TypeScript and is provided by Axios. It is used to check if an error is of the AxiosError type and converts the error object to the AxiosError type.
I also return 400 (bad requests ) if the email has been registered before.
Note: Ensuring the Mailchimp API takes the correct arguments is crucial. While working on this, I included a first name input field in the data object, but the API consistently returned a 500 server error. After studying what Mailchimp API accepts as arguments for that API endpoint, I was able to solve the server response issue.
This happened while trying to get a form field for both first name and email to work. The lesson learned here is to ensure the API's required data structure is understood before creating the front-end UI for it.
Create a Newsletter Form Component.
Now that we have an API endpoint for making a POST request to newsletter MailChimp API, Let's create the client-side UI form where users can input and submit their email to subscribe to our newsletter.
I already have an input form field created, so feel free to use my design or whatever form design of your choice.
Create a newsletter.tsx file in the components folder. Add the code below
/component/newsletter.tsx
1import React from "react";
2
3const Newsletter = () => {
4  return (
5    <form className="rounded px-8 pt-6 pb-8 mb-4 max-w-md">
6      <div className="flex">
7        <input
8          className="grow mr-1 transition ease-out delay-75 focus-within:border-2 focus-within:border-purple-600 items-center h-14 pr-0.5 border border-purple-600 rounded caret-purple-700 outline-none px-4 disabled:border-slate-400"
9          type="email"
10          placeholder="What is your email address?"
11        />
12        <button
13          className="bg-violet-700 hover:bg-violet-500 text-white font-bold py-2 px-4 rounded focus:outline-none focus:shadow-outline disabled:bg-slate-400"
14          type="submit"
15        >
16          Subscribe
17        </button>
18      </div>
19    </form>
20  );
21};
22
23export default Newsletter;
24
The code above includes an email input field and a submit button styled with Tailwind CSS. Call newsletter.tsx inside your main component to render it on the DOM.
Now that we have a simple email input form and a submit button, let’s add the subscription functionality and error handling.
Connecting Newsletter Form to Mailchimp
Create State Variables
To implement this functionality, we need some state variables.
/components/newsletter.tsx
1import { useState } from "react";
2
3const Newsletter = () => {
4  const [email, setEmail] = useState<string>("");
5  const [status, setStatus] = useState<
6    "success" | "error" | "loading" | "idle"
7  >("idle");
8  const [responseMsg, setResponseMsg] = useState<string>("");
9  const [statusCode, setStatusCode] = useState<number>();
10
11  return (
12    <form className="rounded px-8 pt-6 pb-8 mb-4 max-w-md">
13      <div className="flex">
14        <input
15          className="grow mr-1 transition ease-out delay-75 focus-within:border-2 focus-within:border-purple-600 items-center h-14 pr-0.5 border border-purple-600 rounded text-purple-900 caret-purple-700 outline-none px-4 disabled:border-slate-400"
16type="email"
17          placeholder="What is your email address?"
18        />
19        <button
20          className="bg-violet-700 hover:bg-violet-500 text-white font-bold py-2 px-4 rounded focus:outline-none focus:shadow-outline disabled:bg-slate-400"
21          type="submit"
22        >
23          Subscribe
24        </button>
25      </div>
26    </form>
27  );
28};
29
30export default Newsletter;
31
In the code above, we use the useState hook to set and manage a few states that we need. Let's break it down.
- email: stores the user's input from the input box.
- status: for tracking purposes.
responseMsg: stores the response message received from the server.- statusCode: We use this to determine which styles to apply based on the server's status code. You will see how I use this shortly.
Form Handling, State Management & Display Server Responses.
Now that we have the state variables we need let's add a handleSubscribe function that will be responsible for making the Axios POST request to the API endpoint we created in subscribe.ts.
/components/newsletter.tsx
1import { FormEvent, useState } from "react";
2import axios from "axios";
3
4const Newsletter = () => {
5  const [email, setEmail] = useState<string>("");
6  const [status, setStatus] = useState<
7    "success" | "error" | "loading" | "idle"
8  >("idle");
9  const [responseMsg, setResponseMsg] = useState<string>("");
10  const [statusCode, setStatusCode] = useState<number>();
11
12  async function handleSubscribe(e: FormEvent<HTMLFormElement>) {
13    e.preventDefault();
14    setStatus("loading");
15    try {
16      const response = await axios.post("/api/subscribe", { email });
17
18      setStatus("success");
19      setStatusCode(response.status);
20      setEmail("");
21      setResponseMsg(response.data.message);
22    } catch (err) {
23
24      if (axios.isAxiosError(err)) {
25        setStatus("error");
26        setStatusCode(err.response?.status);
27        setResponseMsg(err.response?.data.error);
28      }
29    }
30  }
31
32  return (
33    <>
34      <form
35        className="rounded px-8 pt-6 pb-8 mb-4 max-w-md"
36        onSubmit={handleSubscribe}
37      >
38        <div className="flex">
39          <input
40            className={`grow mr-1 transition ease-out delay-75 focus-within:border-2 focus-within:border-purple-600 items-center h-14 pr-0.5 rounded caret-purple-700 outline-none px-4 disabled:border-slate-400 border ${statusCode == 400 ? "border-orange-500" : "border-purple-600"} `}
41            type="email"
42            placeholder="What is your email address?"
43            value={email}
44            onChange={(e) => setEmail(e.target.value)}
45            disabled={status == "loading"}
46          />
47          <button
48            className="bg-violet-700 hover:bg-violet-500 text-white font-bold py-2 px-4 rounded focus:outline-none focus:shadow-outline disabled:bg-slate-400"
49            type="submit"
50            disabled={status == "loading"}
51          >
52            Subscribe
53          </button>
54        </div>
55        <div className="server-message pt-4 text-green-600">
56          {status === "success" ? (
57            <p className="text-green-600">{responseMsg}</p>
58          ) : null}
59          {status === "error" ? (
60            <p className="text-orange-600">{responseMsg}</p>
61          ) : null}
62        </div>
63      </form>
64    </>
65  );
66};
67
68export default Newsletter;
69
70
The code above defines an asynchronous function called handleSubscribe. This function is called when a user clicks the subscribe button, or presses enter to submit the form.
The handleSubscribe function takes an event (e) parameter of type FormEvent<HTMLFormElement>.
e.preventDefault() prevents the form from refreshing the page when a user submits the form.
Next, we create a try-catch block to handle the asynchronous API request. We use axios to make a POST request to /api/subscribe with the email data.
While the subscription request is being processed, we set the status to loading.
If the POST request is successful, we:
- Set the status to "success".
- Set the
statusCodeto the HTTP status code returned by the server - Clear the email input field
- Set the
responseMsgbased on the message returned from the server.
To use this function, we attach the handleSubscribe event handler function to the onSubmit event on the form element.
1<form className="rounded px-8 pt-6 pb-8 mb-4 max-w-md" onSubmit={handleSubscribe}
Next, we add the value prop to the input field and set the value to the email state.
We use the onChange event to update the email state with the user's input in the box.
Finally, if the status is set to "loading", we disable both the input field and the button element.
1<input
2  ...
3  value={email}
4  onChange={(e) => setEmail(e.target.value)}
5  disabled={status === "loading"}
6/>;
7
8<button
9  ...
10  disabled={status === "loading"}
11>
12
13
Conditional Rendering for Success and Error Messages
Lastly, we add a div section to display the server response messages stored in the responseMsg variable. We render them conditionally and style the input field border based on the value of the status variable.
1<div className="server-message pt-4">
2  {status === "success" && (
3    <p className="text-green-600">{responseMsg}</p>
4  )}
5  {status === "error" && (
6    <p className="text-orange-600">{responseMsg}</p>
7  )}
8</div>;
9
10
If status === 'success', we set the response message from the server and style the text with the colour green using Tailwind CSS.
If status === 'error', we render the response message, style the text colour to orange, and style the input text field border to orange to indicate an error, as shown in the code below, but only if the status code is 400 (Bad request).
1<input
2  className={`grow mr-1 transition ease-out delay-75 focus-within:border-2 focus-within:border-purple-600 items-center h-14 pr-0.5 rounded caret-purple-700 outline-none px-4 disabled:border-slate-400 border ${
3    statusCode == 400 ? "border-orange-500" : "border-purple-600"
4  } `}
5  ...
6/>;
7
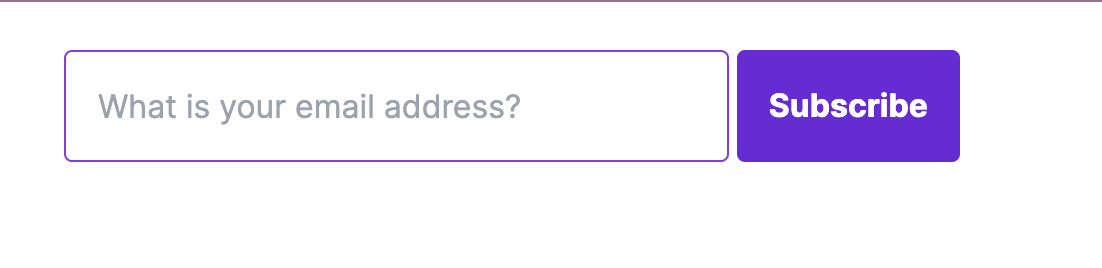
Final Result
Enhancing Subscription Form UX
Managing Success and Error Messages
Now that we have our subscription form in place, we can take a closer look at how we render success and error messages. Currently, we have two separate <div> elements handling these messages.
It may be worthwhile to consider refactoring the code to use only one
Clear the response message.
Additionally, to provide a smoother user experience, you can add a setTimeout function to handleSubmit function to automatically clear the response message after a brief period. This prevents the message from lingering on the screen, offering a more polished and user-friendly interaction. Check the code on GitHub to see how I implemented that.
You can explore this option later on if you'd like. Good luck! 🌷
View the complete code on GitHub
Conclusion
Check out the source code on GitHub to view the complete code.
I hope this article was helpful. If you have any questions or comments, add it on Medium.
Recommended Reads
-
The Complete Guide to Building React Forms with useState Hook.
-
[For a quick overview of how to build forms with React Hook, check this article].(https://www.agirlcodes.dev/how-to-build-forms-with-multiple-input-fields-using-react-hooks)